Tags
Tags provide a flexible way of grouping data, primarily for user inputs for use with scenarios but also for organizing simulation output such as charts and chart dashboards. Multiple different tags can be applied to a record, and a single tag can be applied to many different records. Tags are differentiated by type: development, constraint, adjustment, chart, and chart dashboard. Only a tag of a given type can be applied to that record type.
Tags allow scenario inputs to be assembled by concepts such as high growth, transit focus or northeast neighborhoods specific plan. Tagged inputs can then be grouped into scenarios, simulated, and re-grouped in an iterative way. Tags on data inputs are sub-scenario groupings of development, constraint, and adjustment records that are used in scenario composition to insert sets of those records into simulations.
Tags allow simulation outputs to be categorized by simulation metadata such as run identifier (e.g. Run 32) or by concepts such as transit focus scenario or charts for April presentation. Tagged outputs can then be used to easily manage and create filtered views of specific simulation results. Similarly, chart dashboards can also be tagged.
Example of a tag
Tags work well for groupings of records that comprise sub-scenario plans or other logical combinations. For example, if transit improvements are expected along a corridor and upzoning will follow, all of the constraints associated with that project could have a transit corridor tag applied to them. Additionally, it might be helpful to create low, moderate, and high growth versions of each of these constraints and further differentiate the tags (e.g. transit corridor low growth, etc.).
Creating a new tag
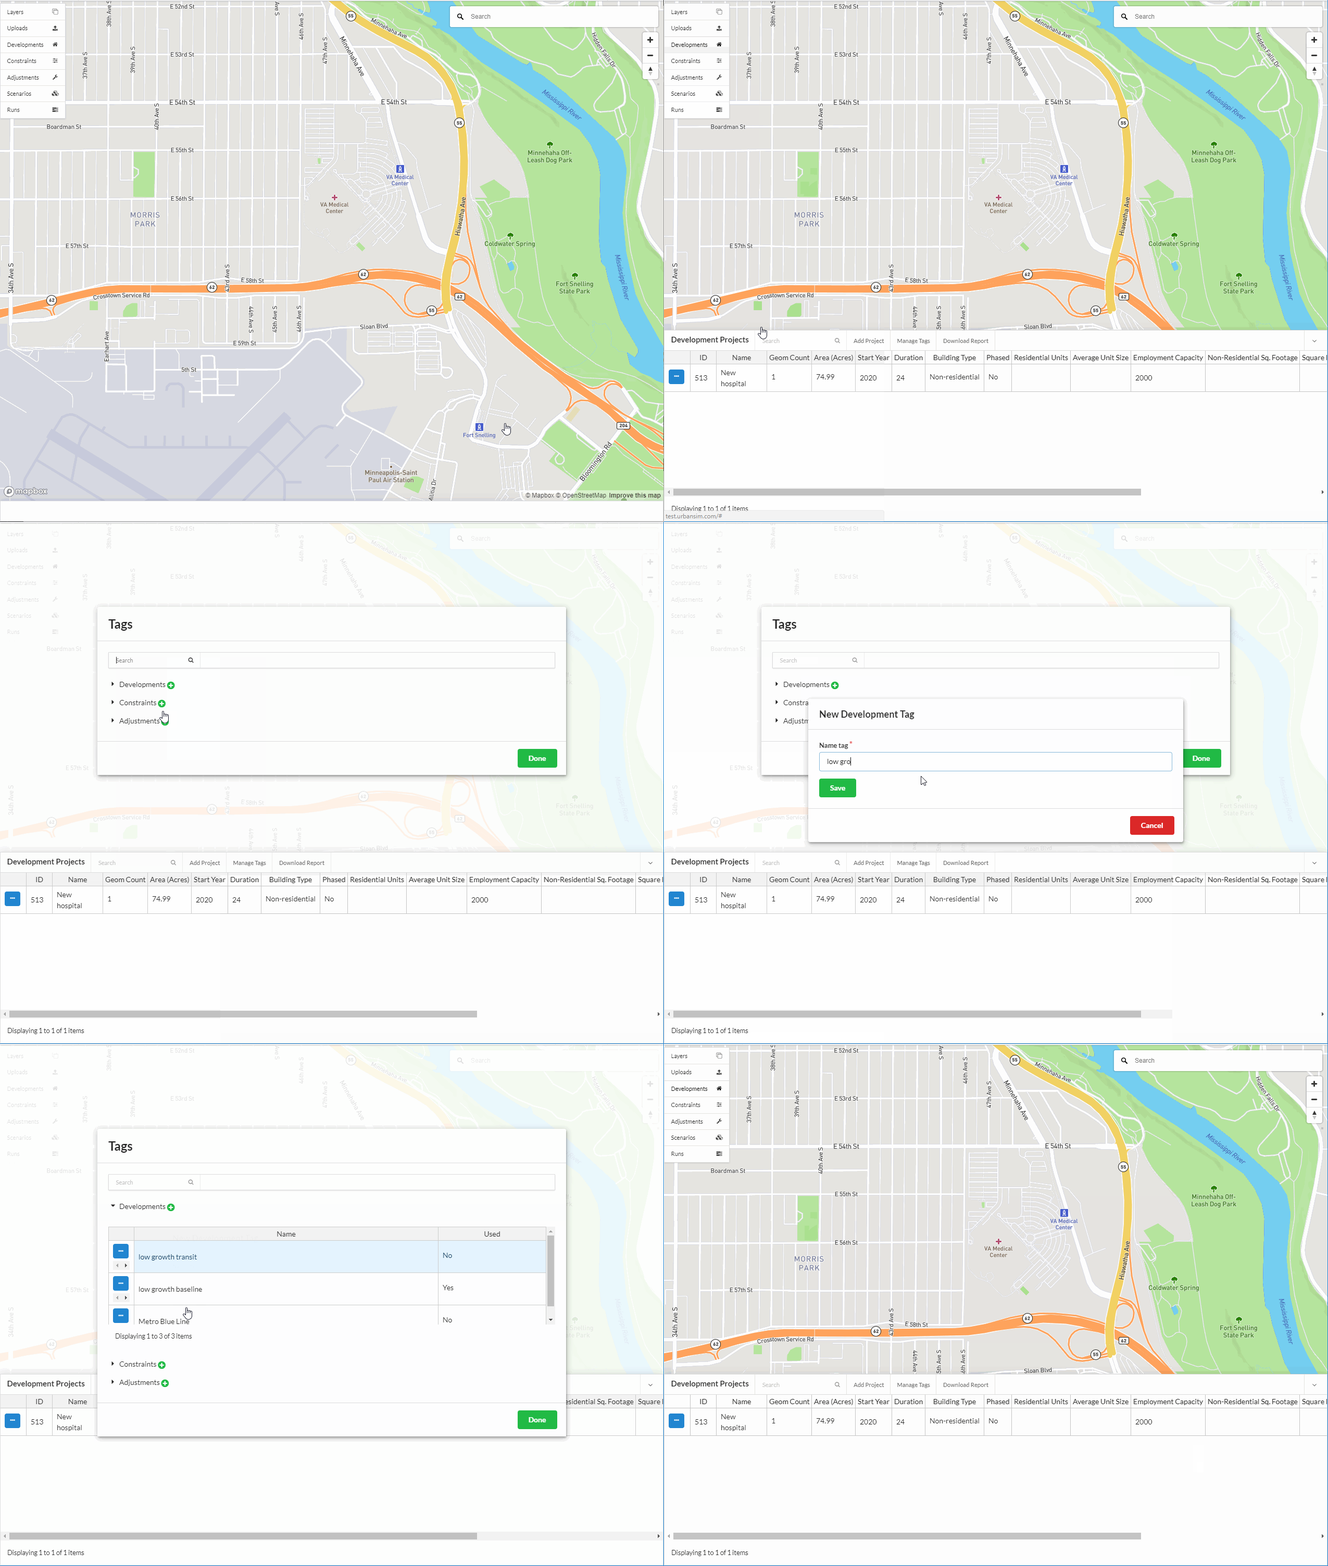
Open the Tags form by clicking the Manage Tags button located at the top of the Developments, Constraints, and Adjustments tables. The same form is available from within the chart dashboard at the top of the Chart table.
Click the drop down for the relevant tags to view existing tags.
Click the Create new tag icon.
Name the new tag and click the Save button.
Editing a tag
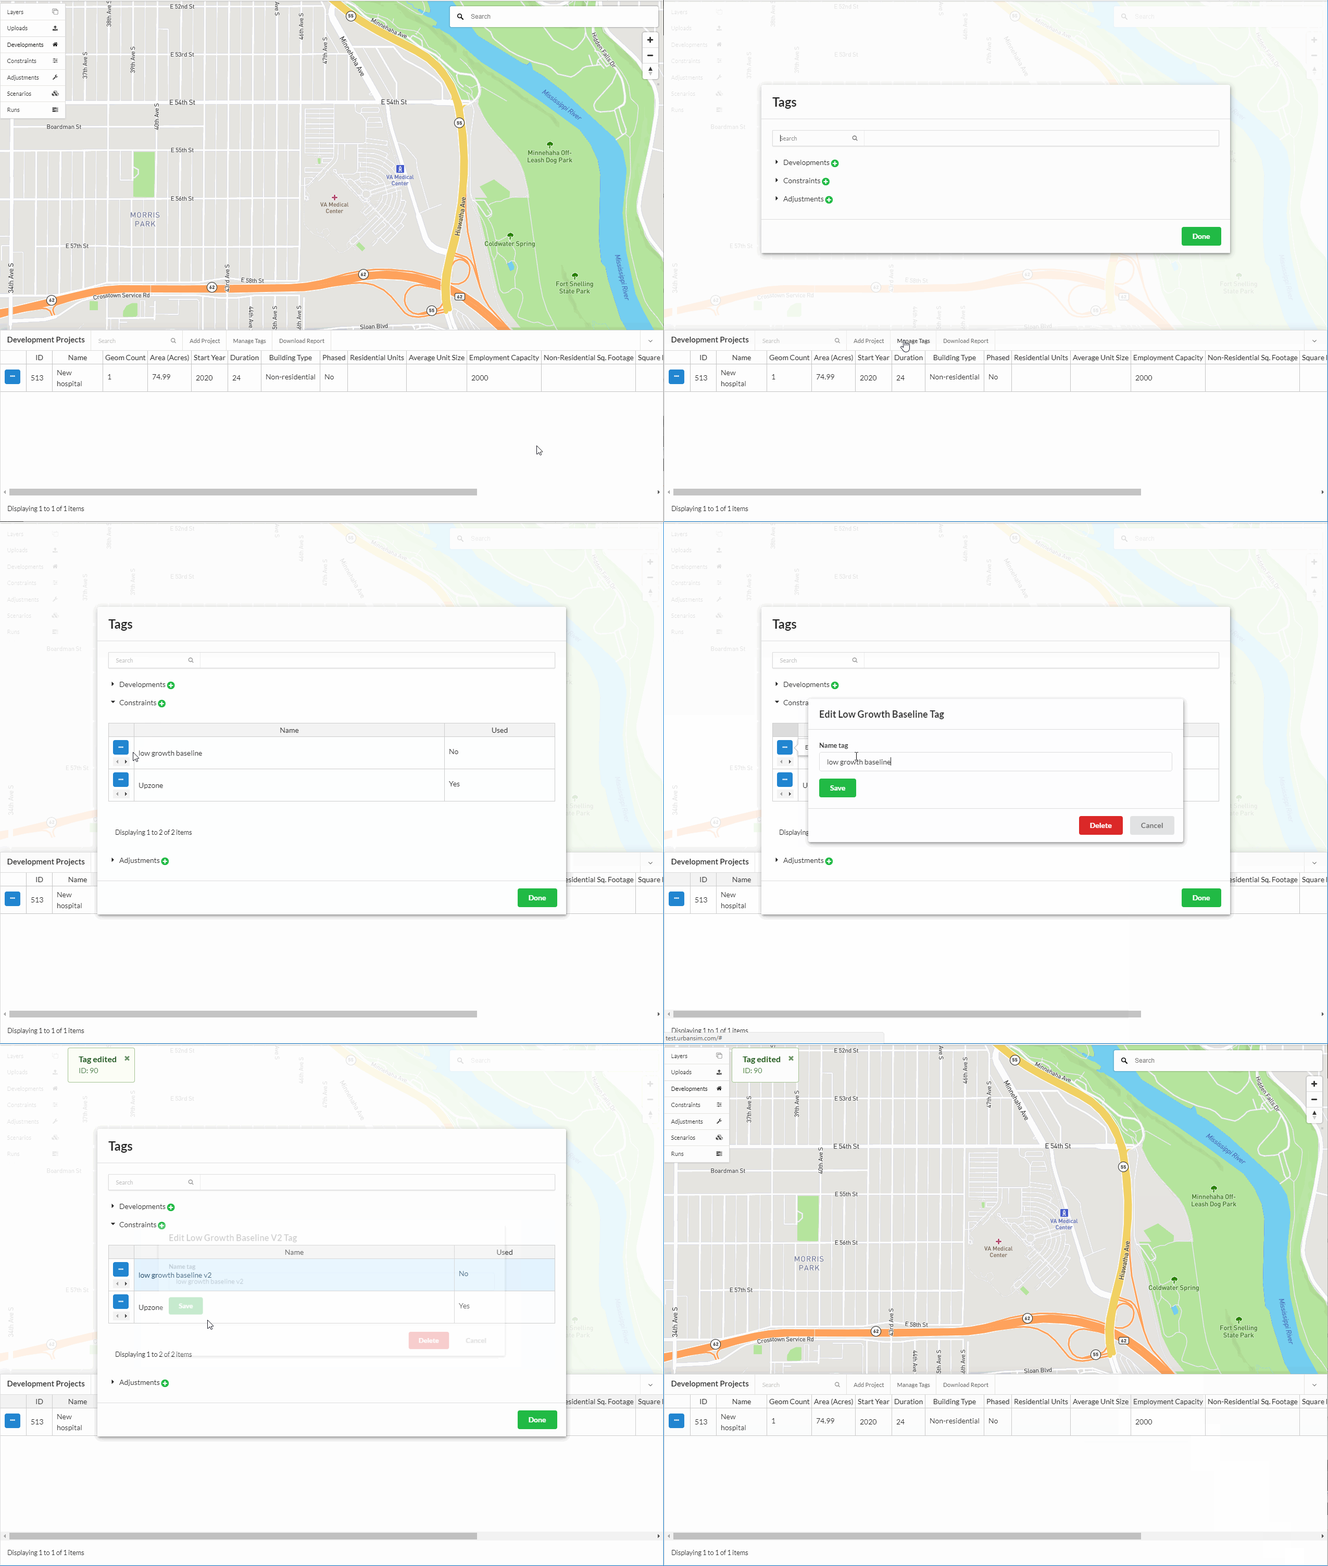
In the tags form, select the type of tag drop down to view existing tags.
Click on the Edit icon for the tag to edit.
Edit the tag name and click Save. The tag name is the only editable information.
Deleting existing tags
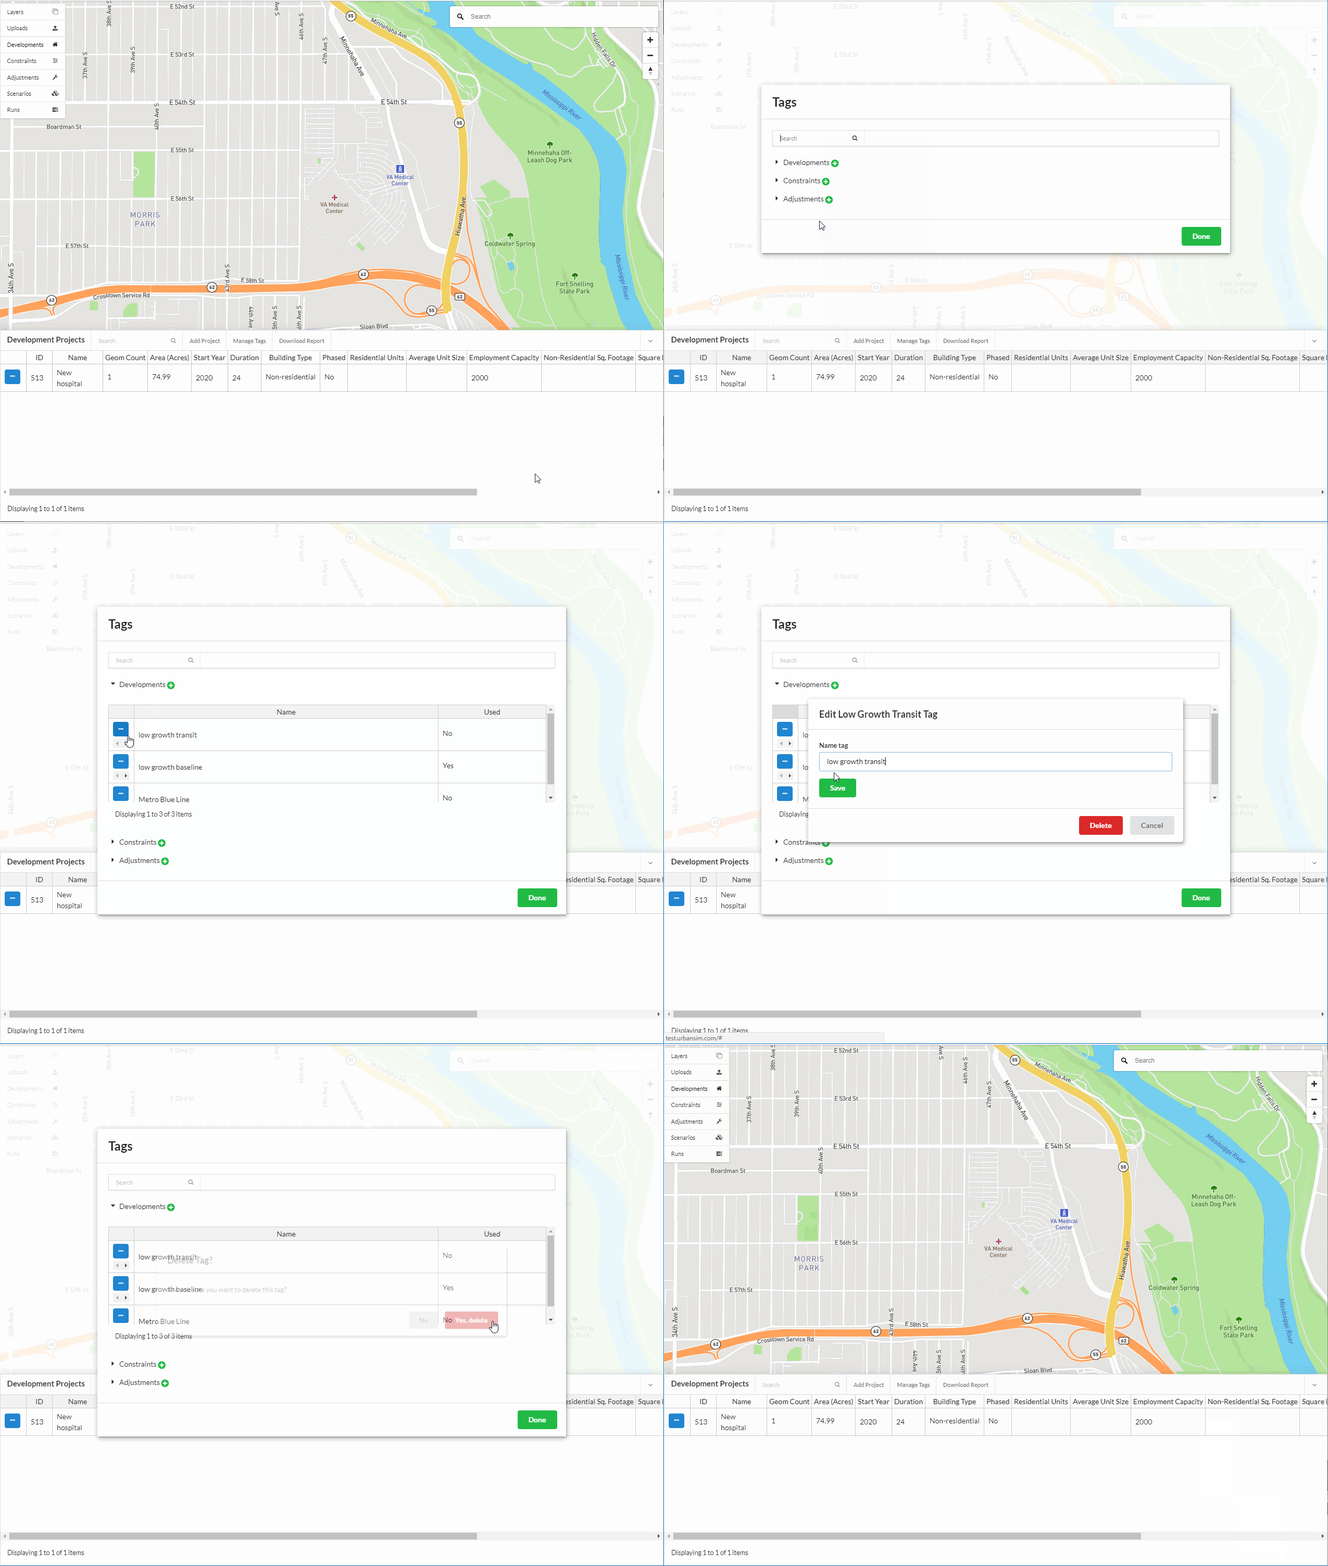
In the tags form, select the type of tag drop down to view existing tags.
Only tags that are not in use in either a development project, constraint, adjustment, scenario, chart, or chart dashboard may be deleted at this time. These records are indicated in the Used column as No. If you would like to delete a tag that is in use, edit the development project, constraint, adjustment, scenario, chart, or chart dashboard that is using the tag to remove it from use.
Click on the Edit icon for the tag to delete.
Click Delete
Applying tags to scenarios
Tags can be applied to constraint, adjustment, or development records:
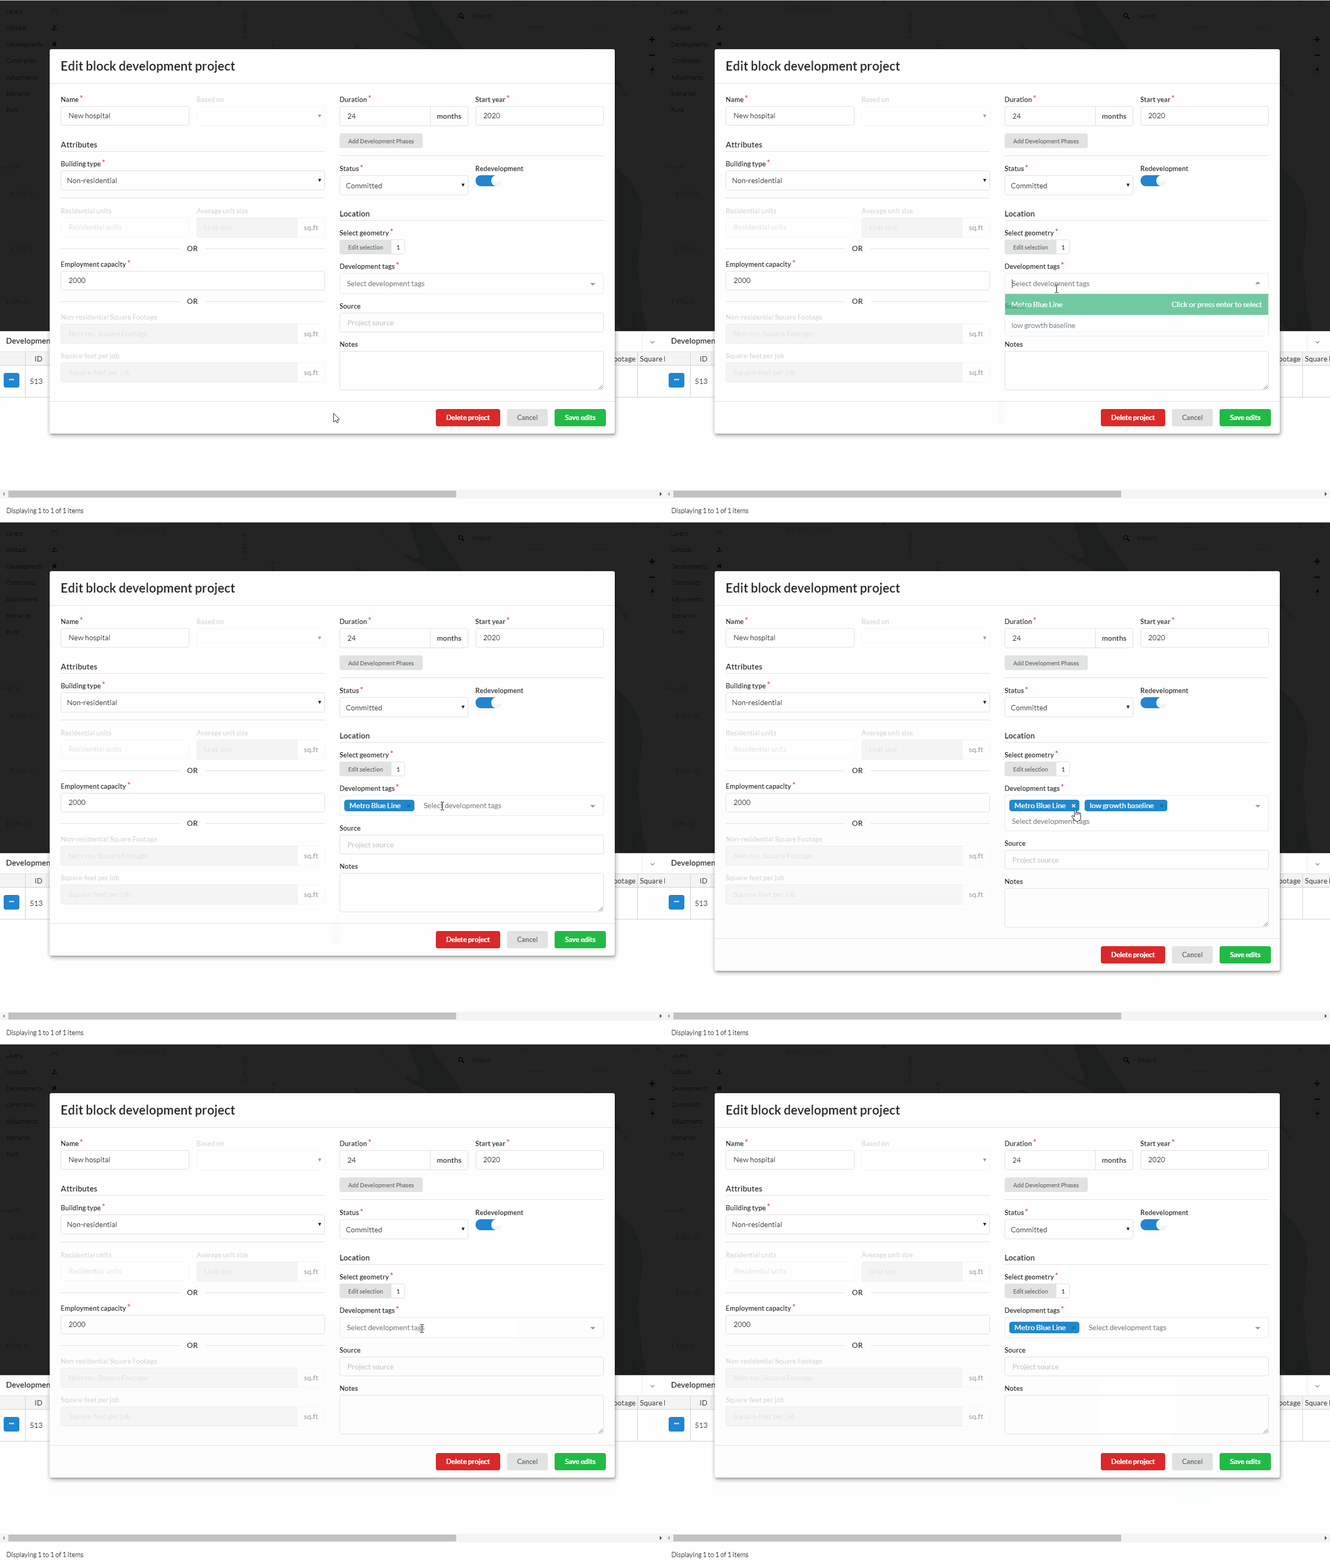
Select the constraint, adjustment, or development record to tag.
Select the desired tag from the tags drop down.
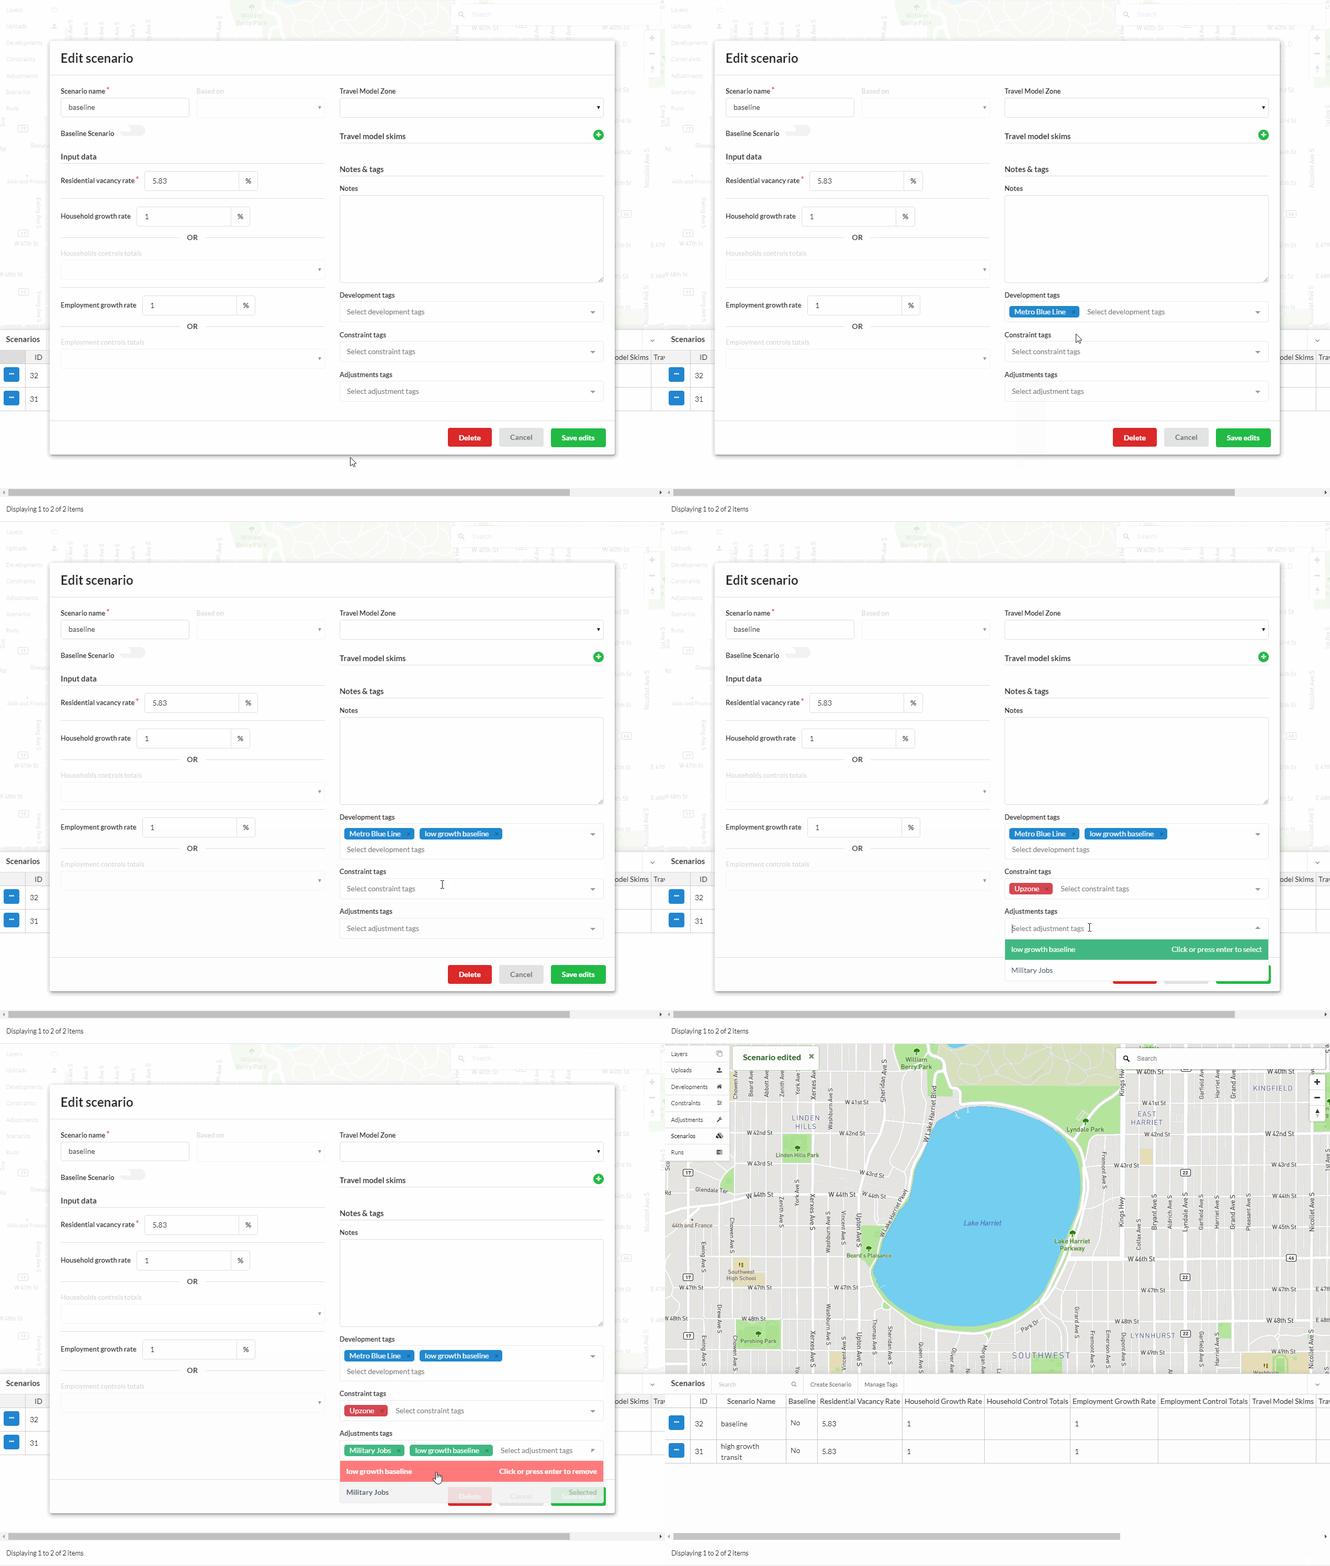
Records with tags can then be utilized inside of a scenario:
Click Save and select the Scenarios tab.
Choose Create Scenario or click the edit icon of an existing scenario.
To add the tag, select the tags drop down that applies to the appropriate category.
Save the scenario once the form is complete.
Filtering table records by tag
See the table filter section for more information on how to filter records in a table by tag.